
The bulk upload feature simplifies adding several employees at once using a structured template, saving you significant time over adding them one by one. This professional guide walks you through the precise steps for a smooth bulk upload process.
Follow the steps given below:
Step-1:
Log into the Payoneer WFM platform. Navigate to the Dashboard upon successful login. Locate the "Add New Hire" option, click the down arrow next to it, and select Import Hire

Alternatively, you can start this process from the "Add new hire" option available within the People section
Step-2:
Select the relevant country for your hires. You are required to view the default template, which is named “Employee_template.xlsx”.Upload your file containing the employee data, ensuring it precisely matches the structure and format of the default template.

Step-3:
The uploaded file will immediately begin validation. Click on View Progress to actively track the status of your bulk upload job.

Step-4:
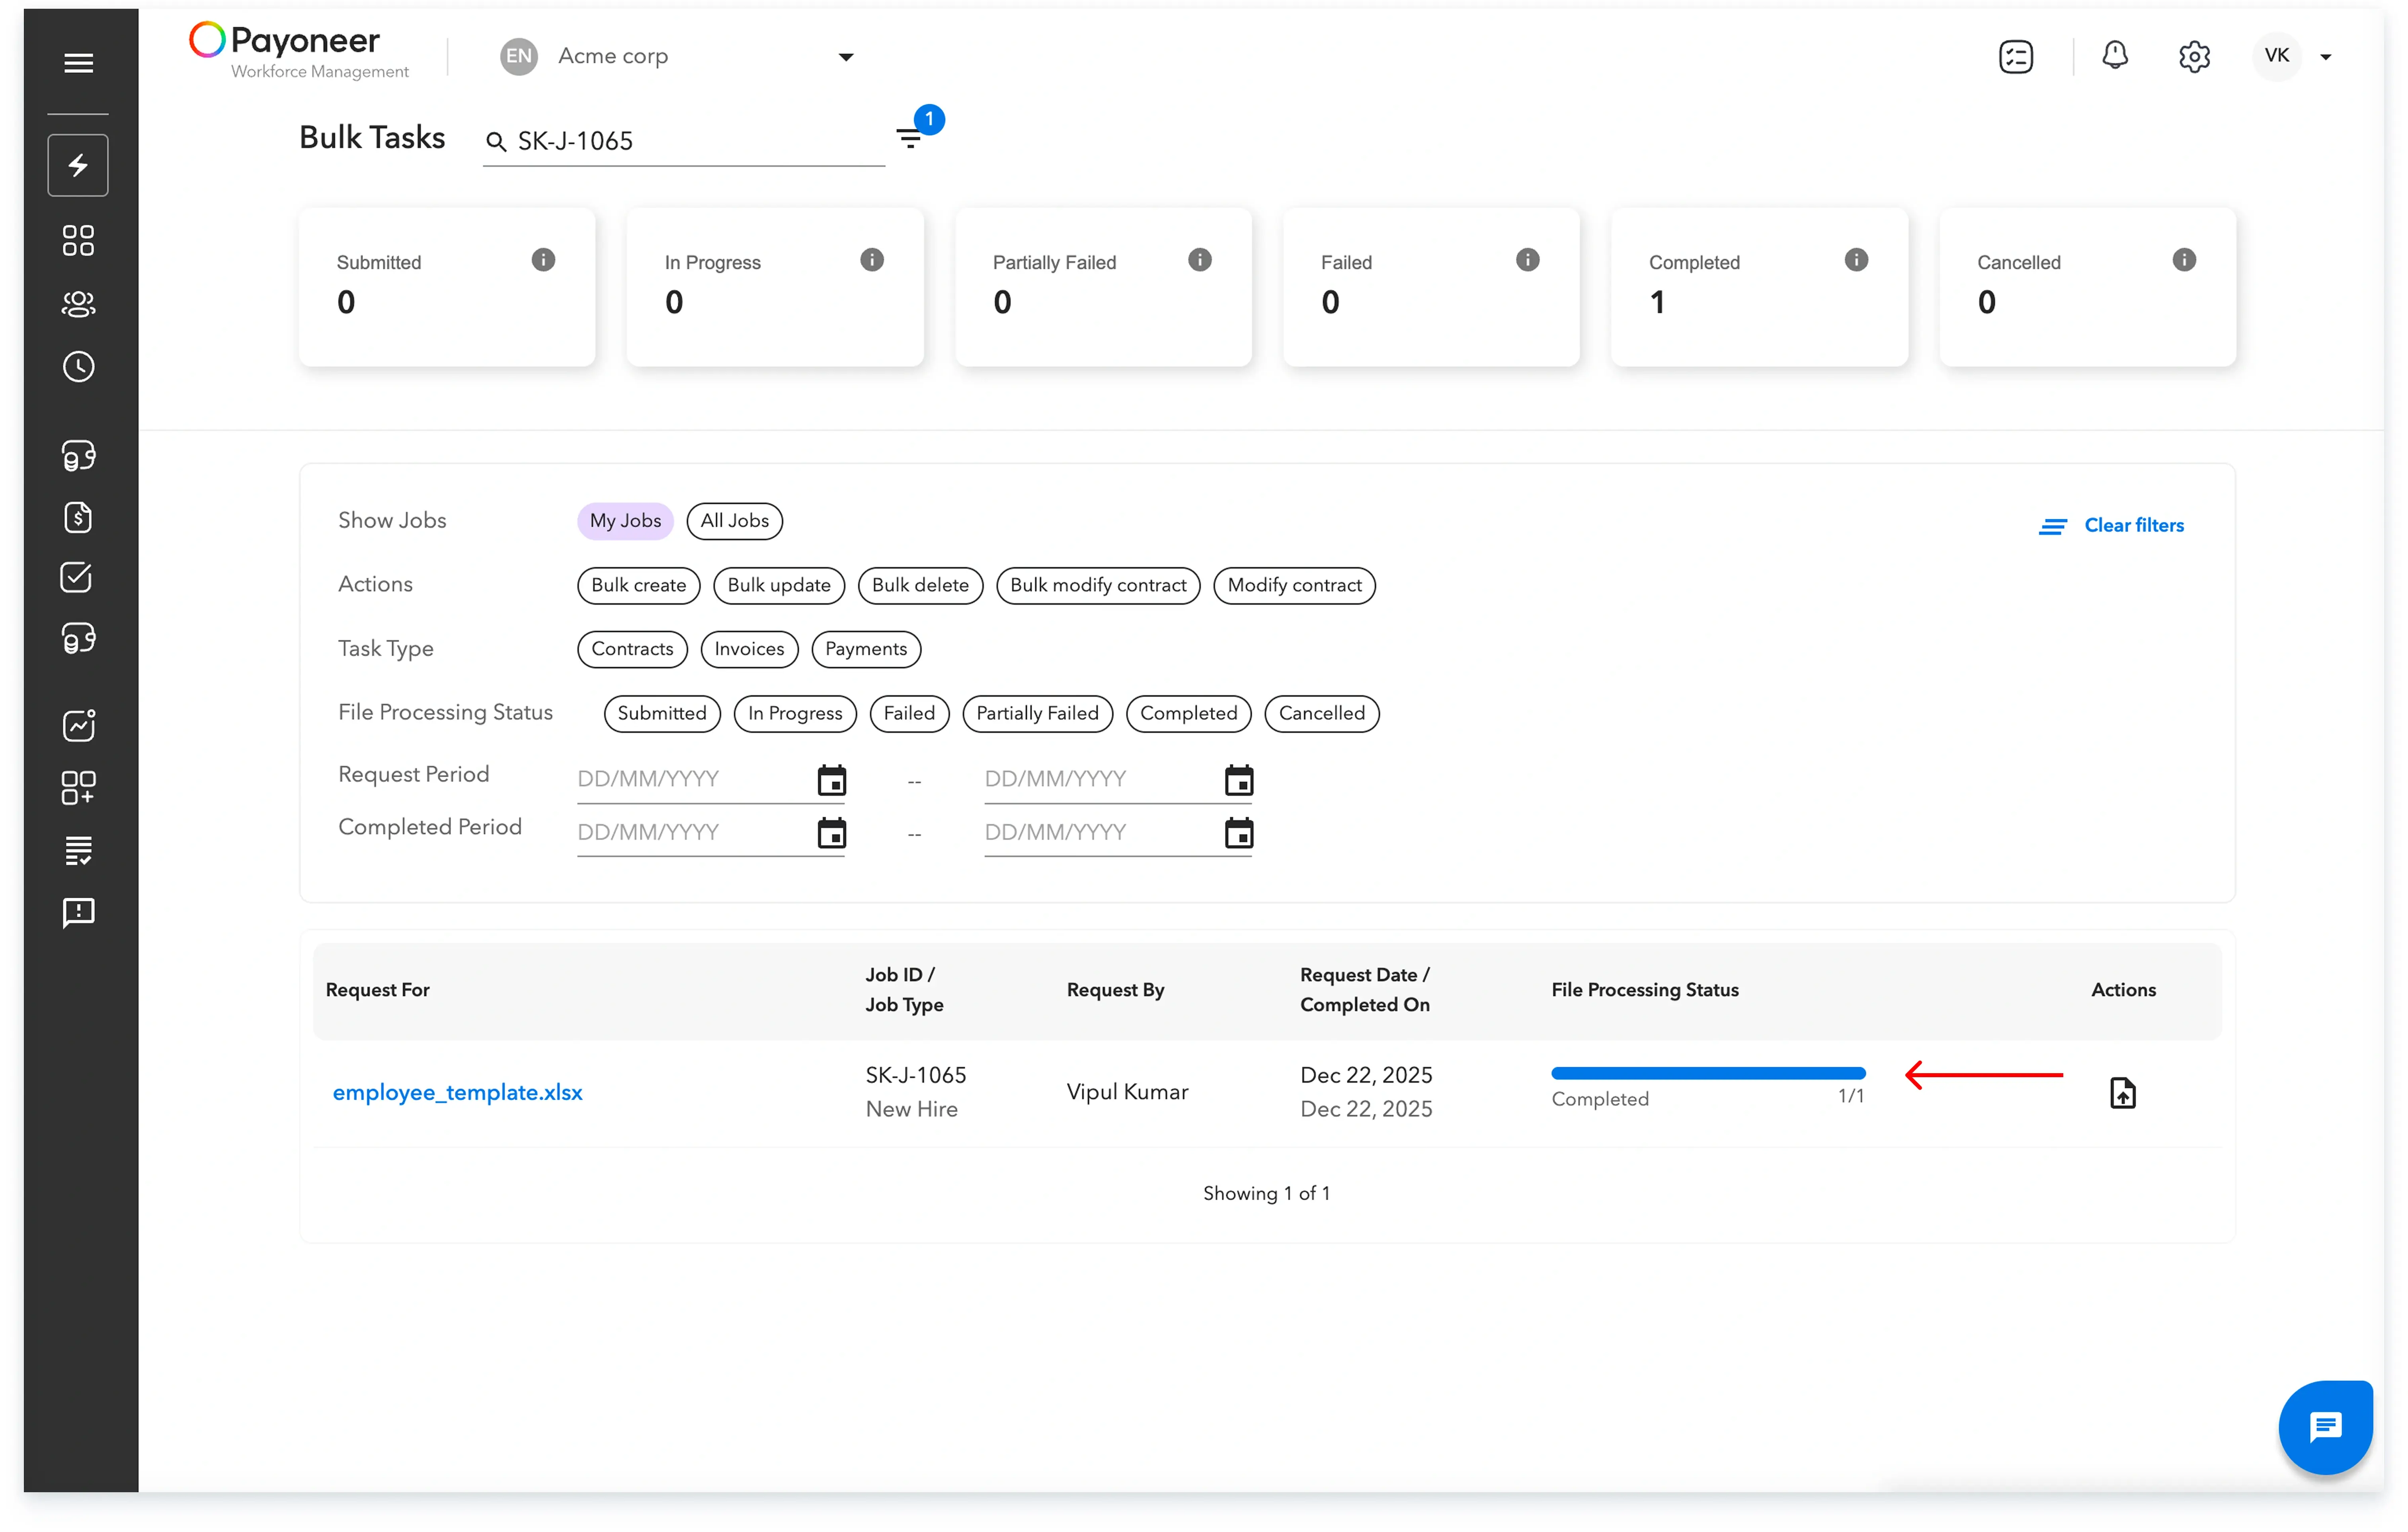
On the Bulk Task screen, you can review details like your uploaded template name, the request date, and the file processing status.

There are 6 possible statuses:
1. Submitted: Indicates the bulk jobs which have been submitted but not yet started
2. In Progress: Indicates the bulk job is ongoing and yet to be finished.

3. Partially Failed: Indicates the bulk job has failed partially due to an issue with some data. You can download the error file, make corrections, and upload it again.
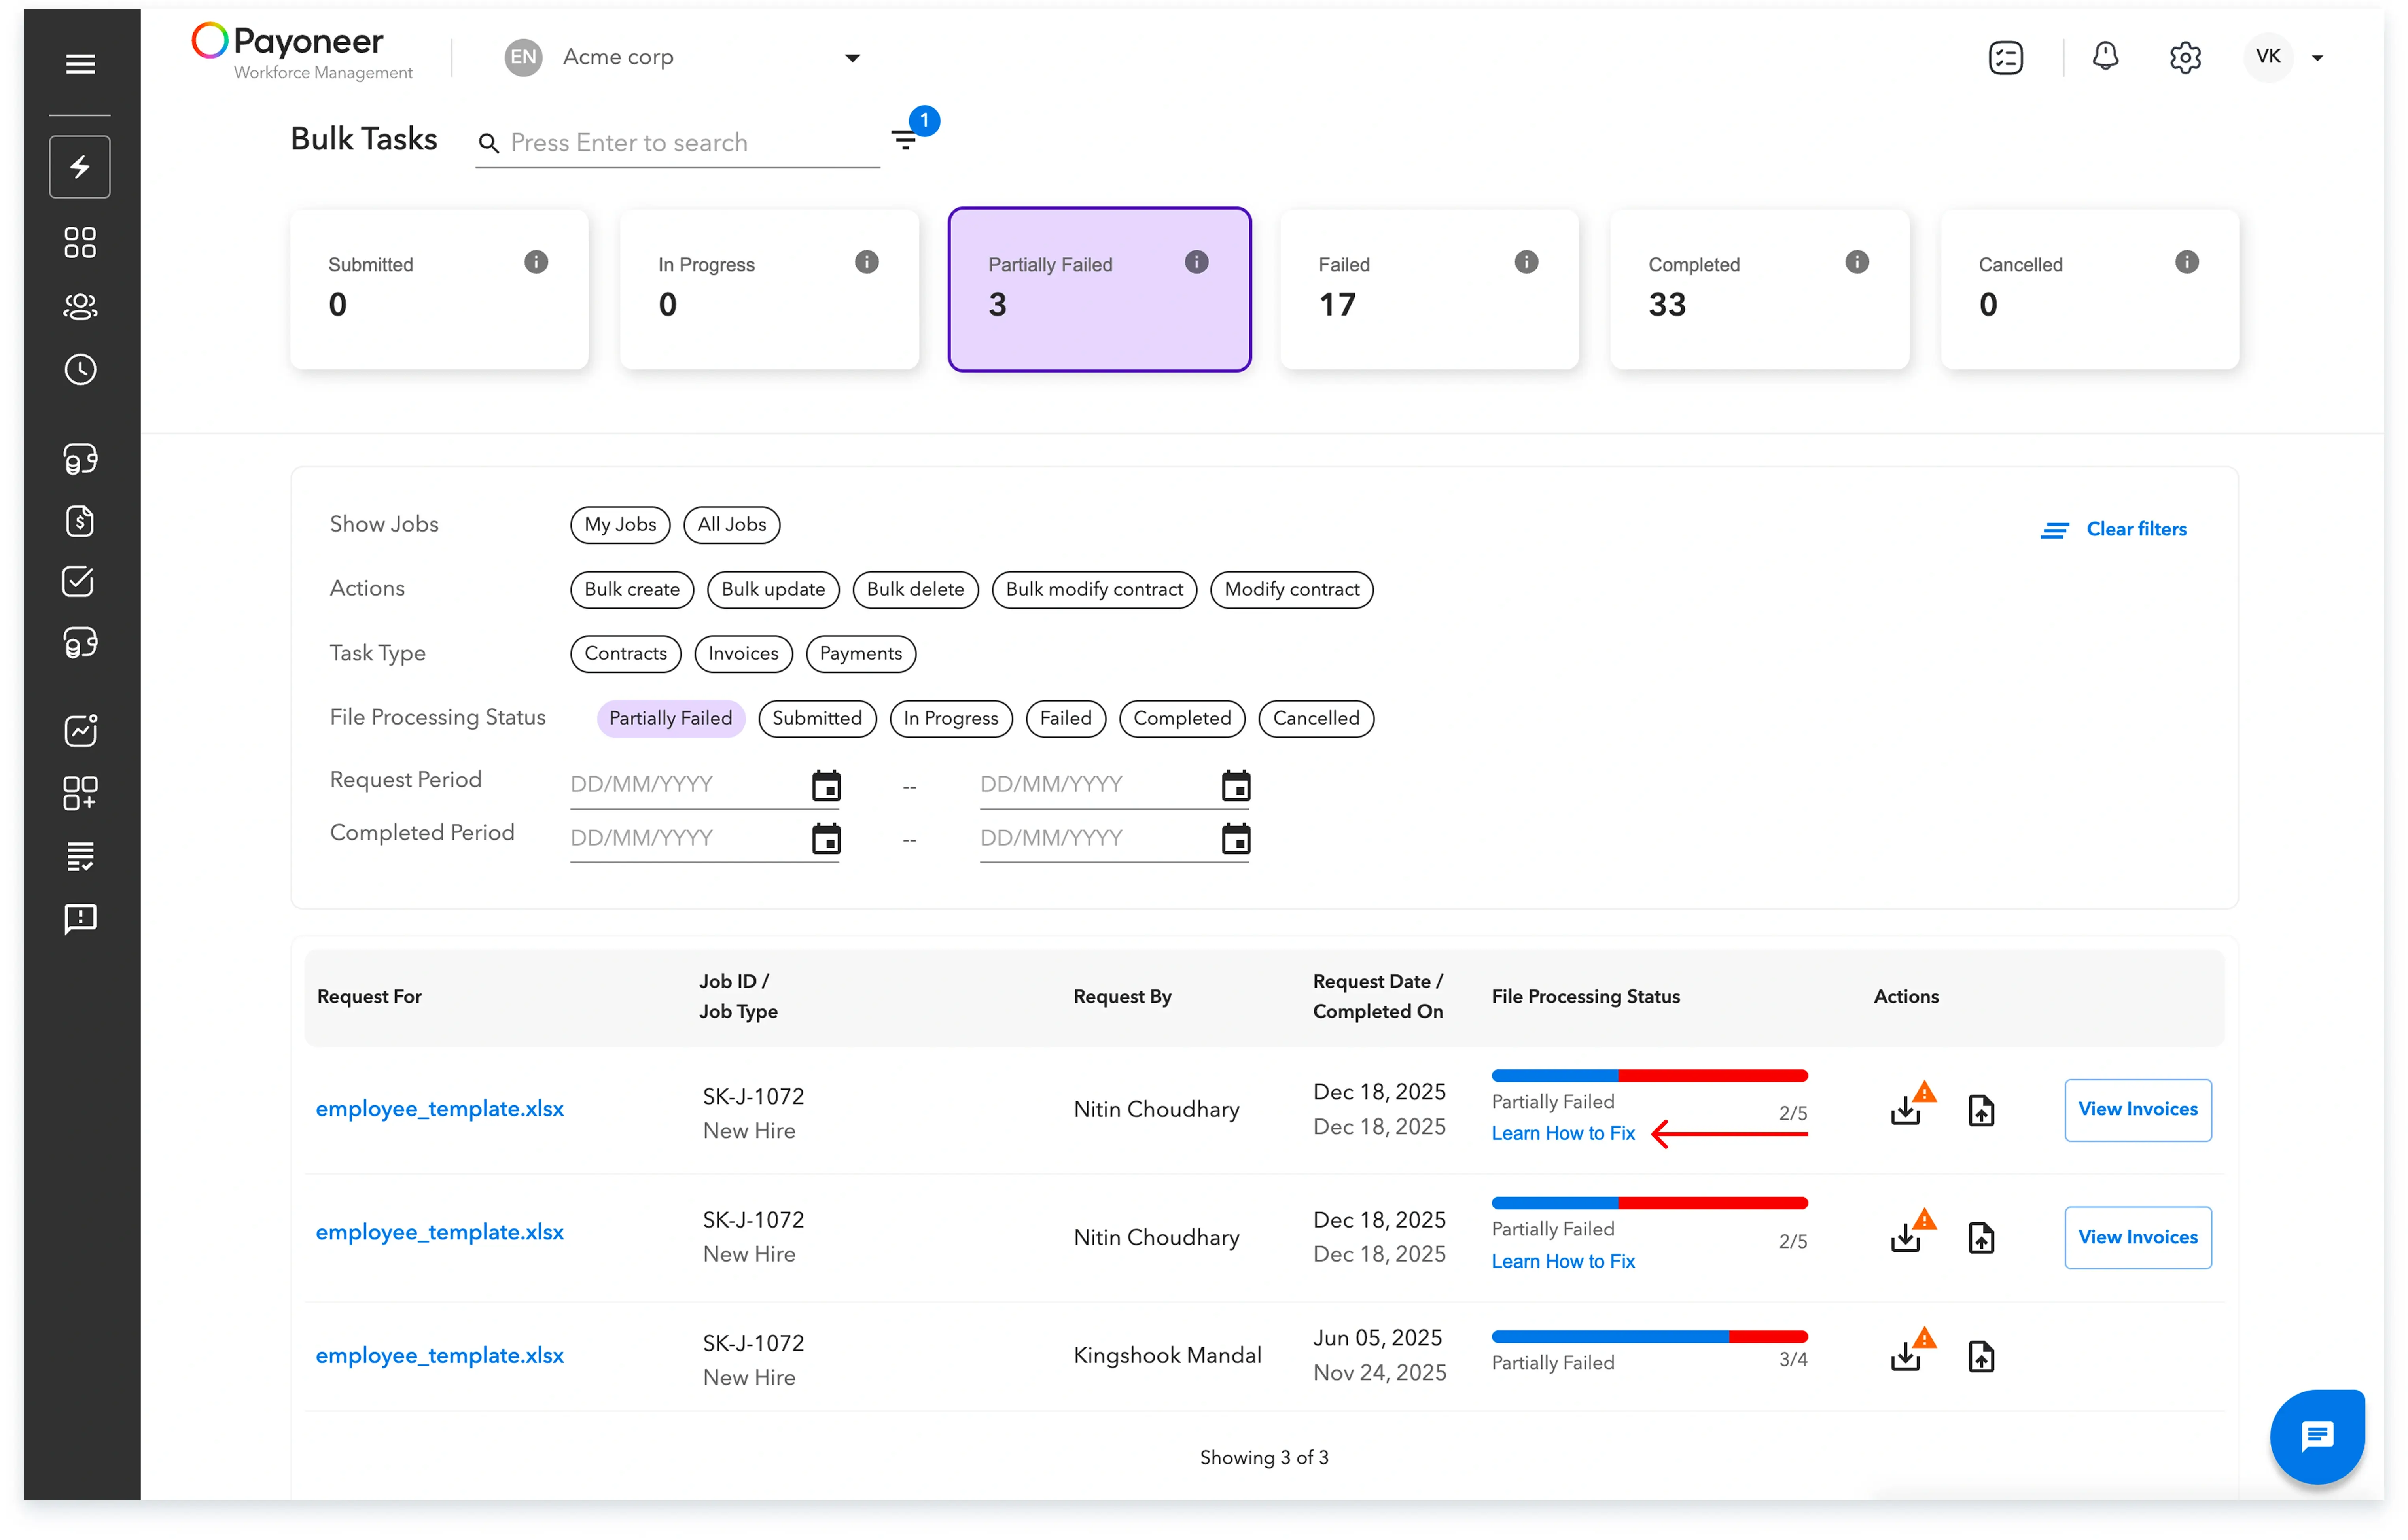

4. Failed: Indicates the bulk job has failed due to an issue with the entire file. You can download the error file, make corrections, and upload it again.


5. Completed: Indicates the bulk upload of this file was successful.
6. Cancelled: Indicates the bulk task has been cancelled.
By following these precise steps, you can successfully leverage the bulk upload functionality for efficient new hire data management.
Global employment, payroll, teams and expansion, simplified.
Request demo