
Setting up your contractor profile on the Payoneer WFM platform is a straightforward process that ensures you are ready to begin your work and receive payments.Profile Setup Steps
Step 1:
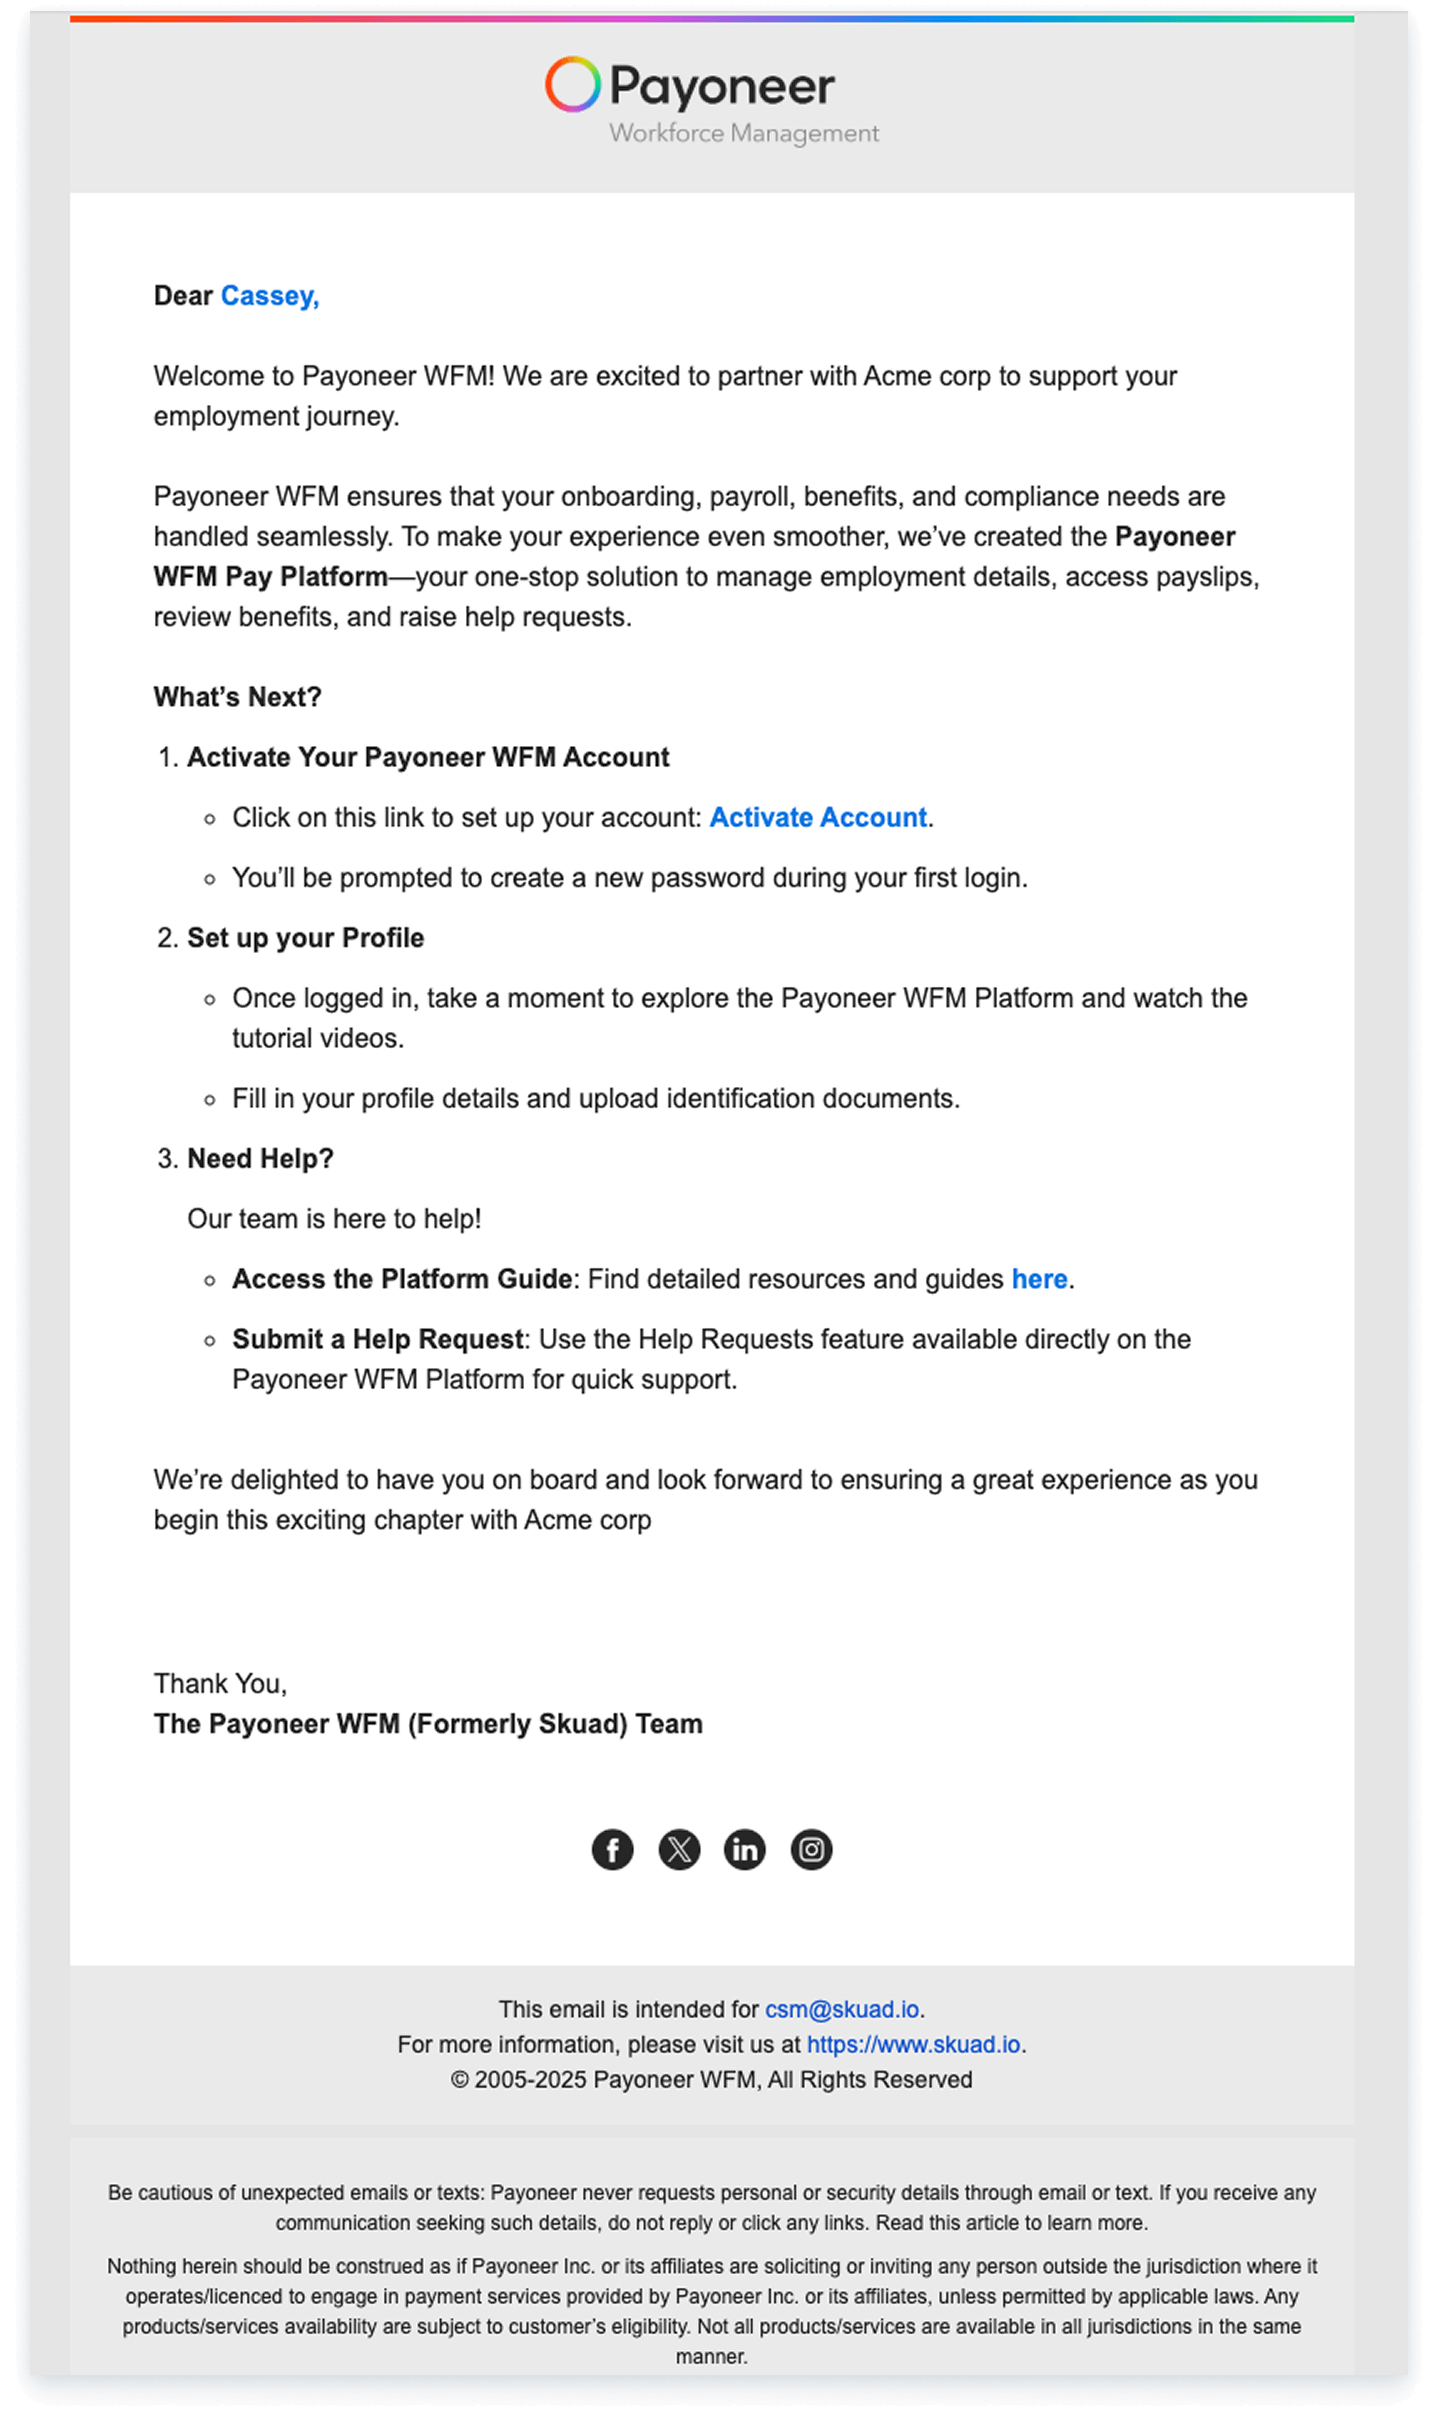
Begin by locating the welcome email from Payoneer WFM, and click on the Activate Account Link
Step 2: Register Your Account
Enter your account details such as full name, Email ID and create a strong password

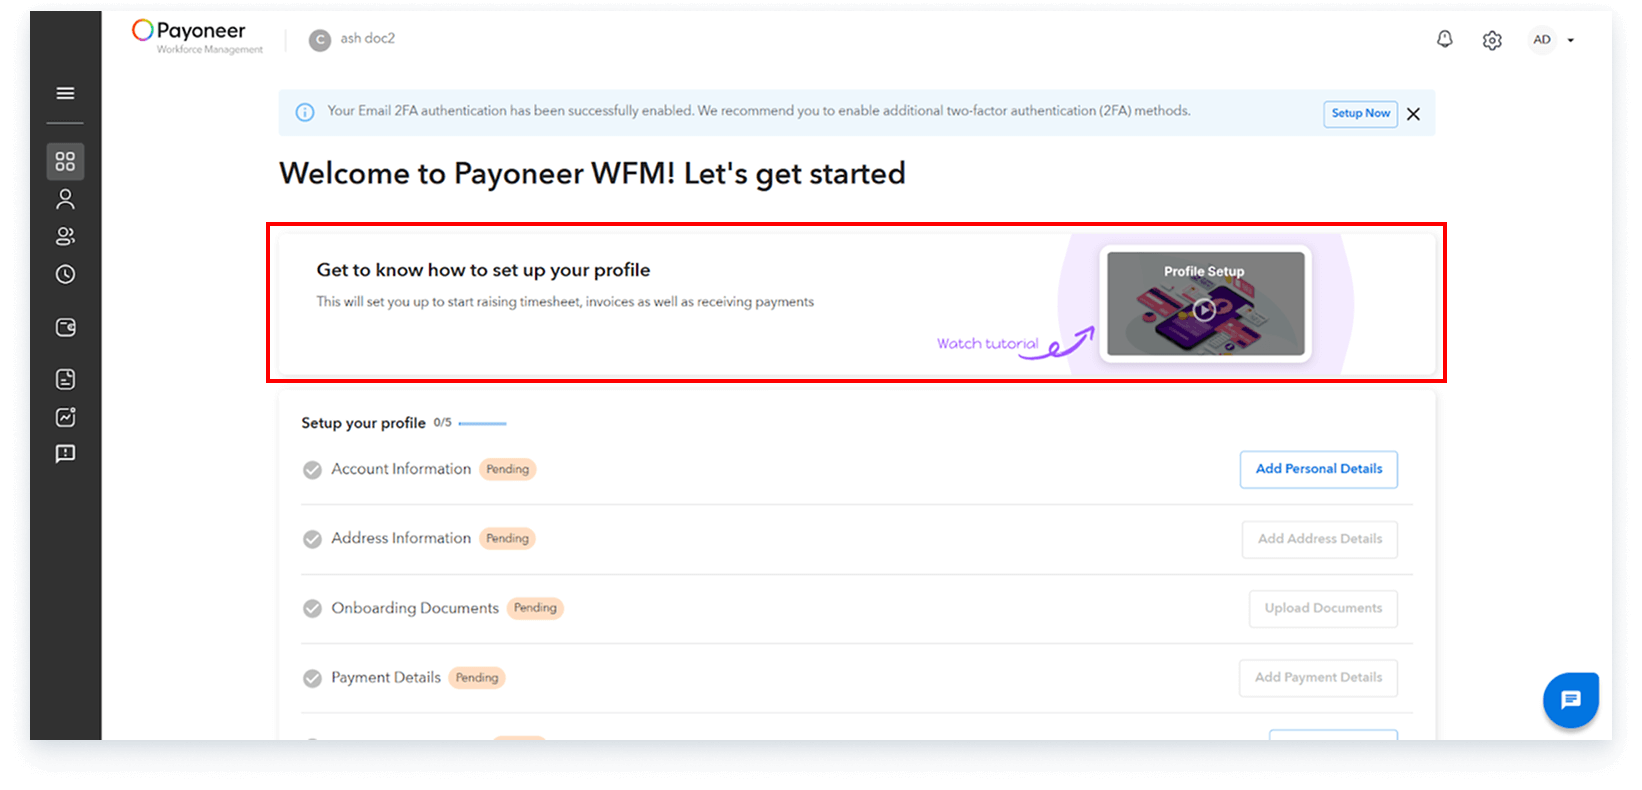
Step 3: Once logged in, we recommend that you go through the profile setup video available on the platform for a better understanding of the process.
Step 4:
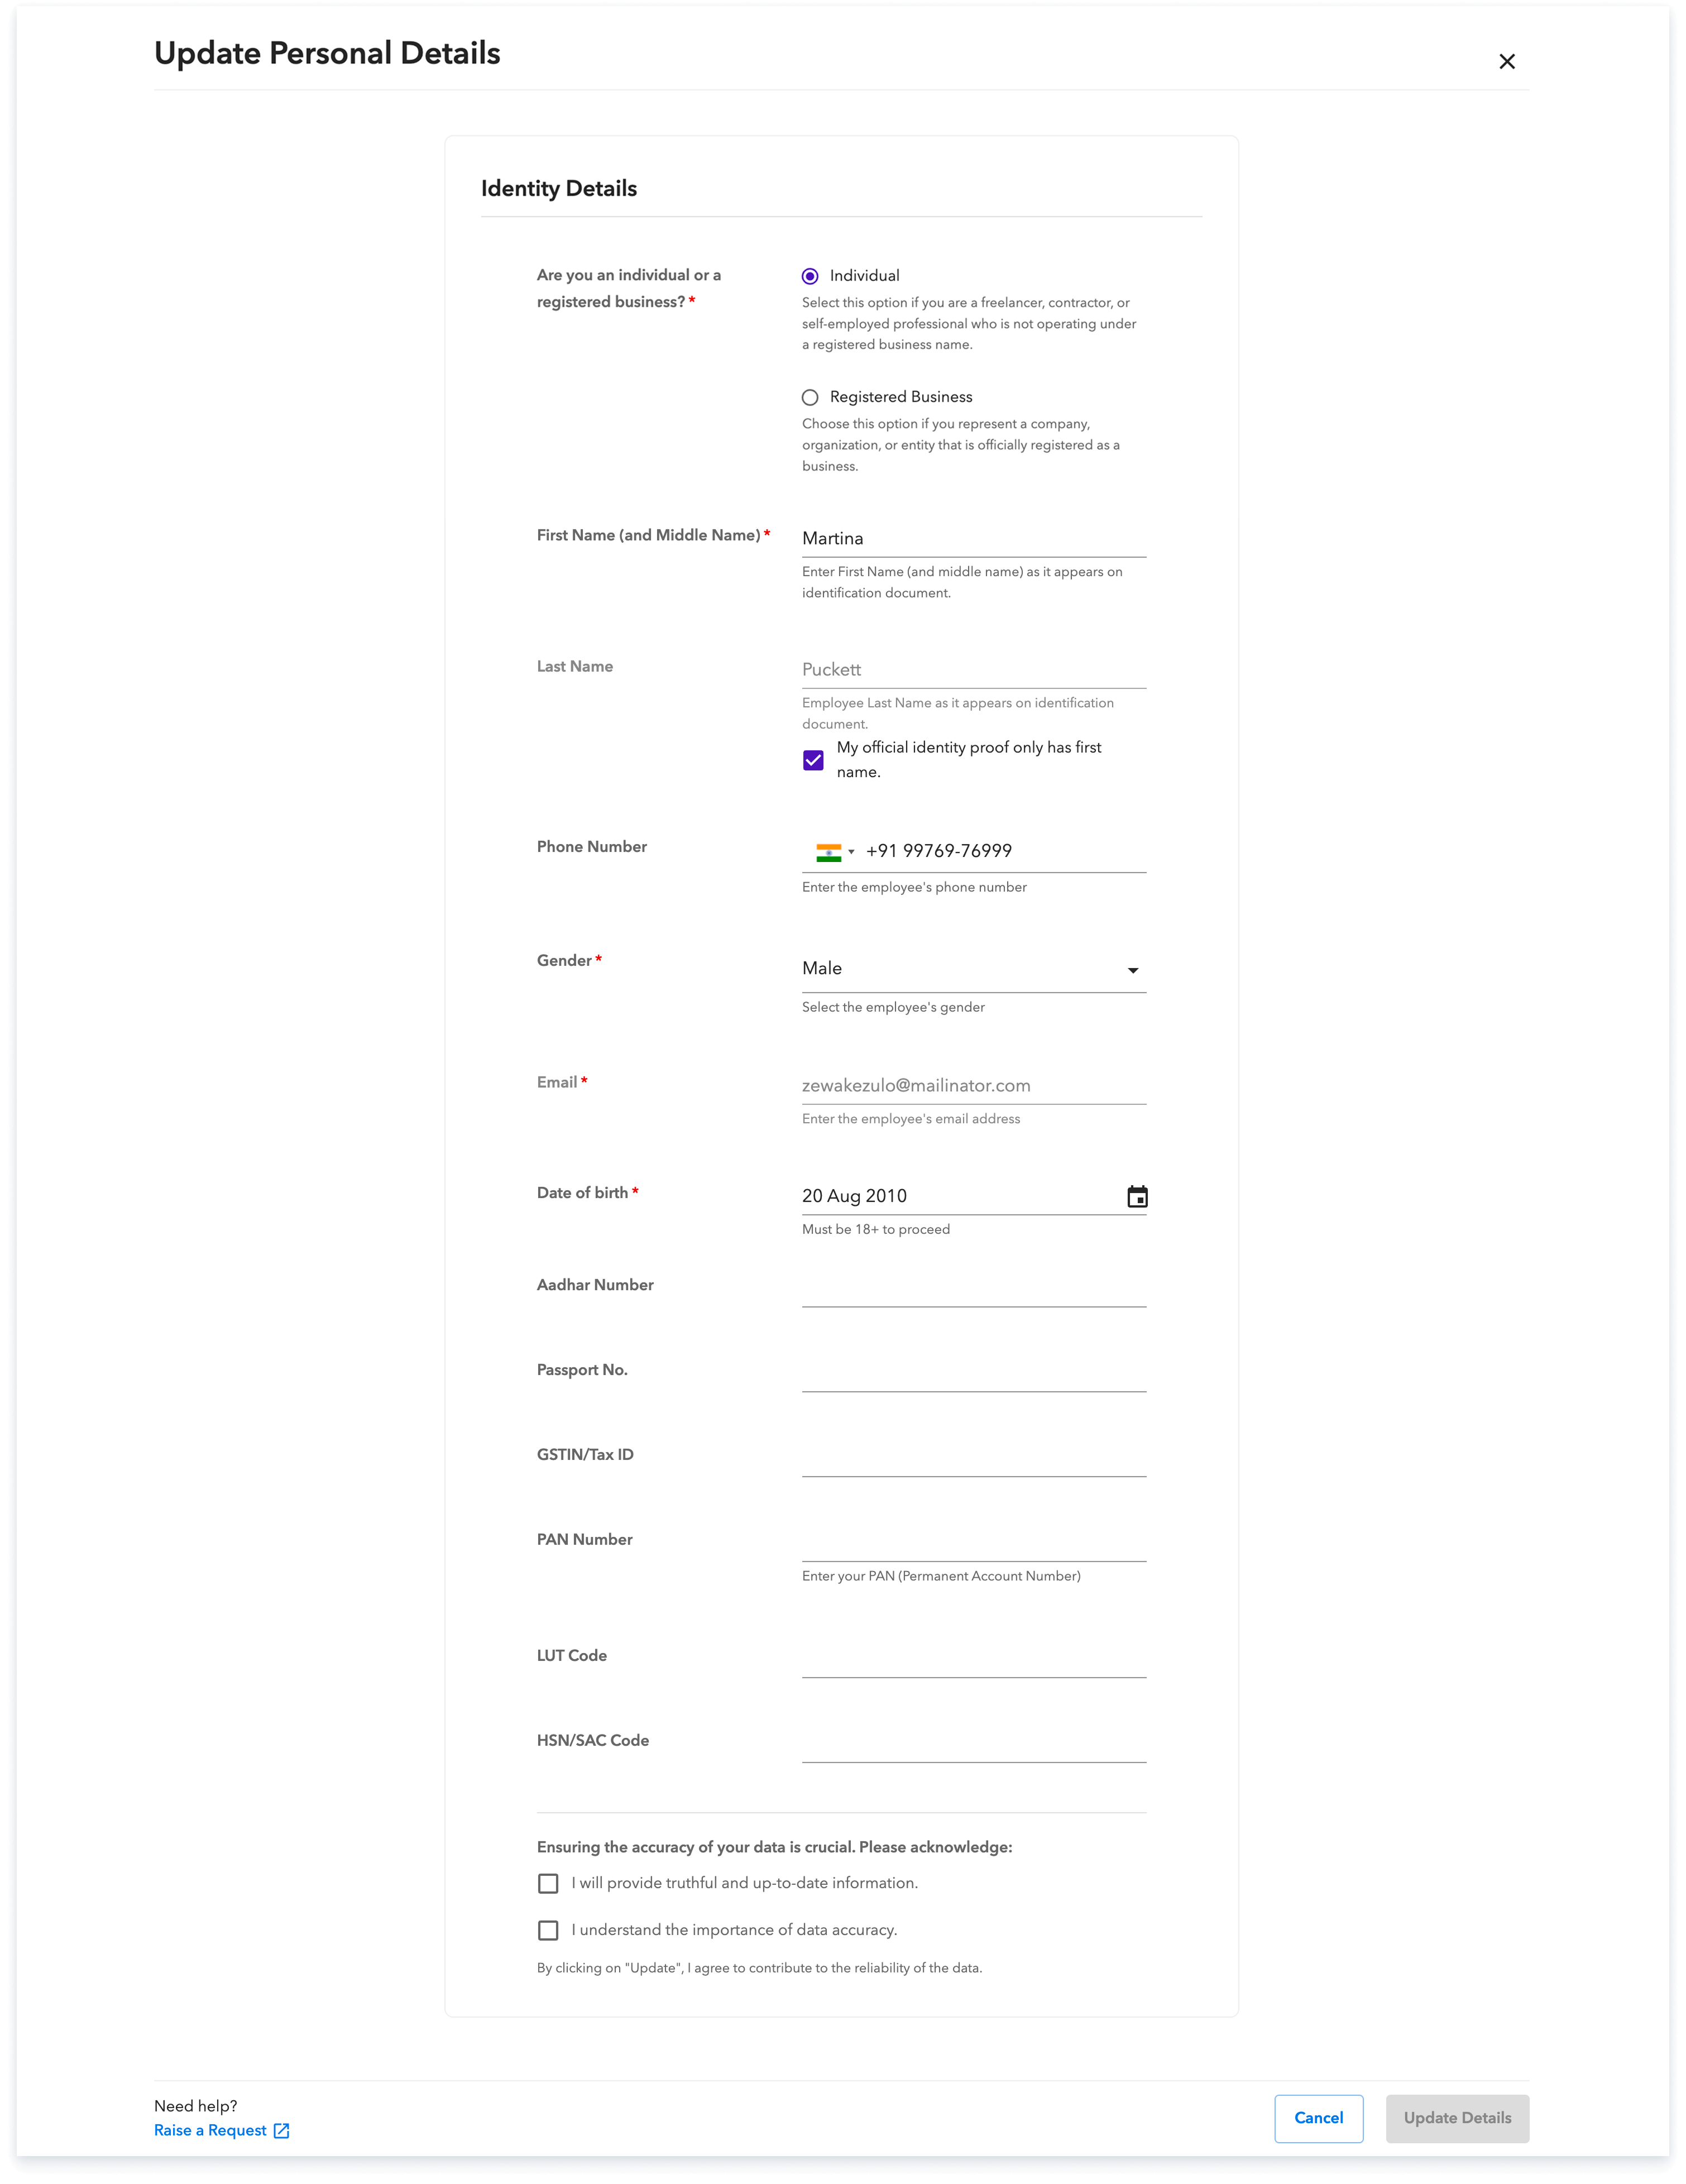
Begin setting up your profile Click on add personal details and fill in the requested information.
Step-5:
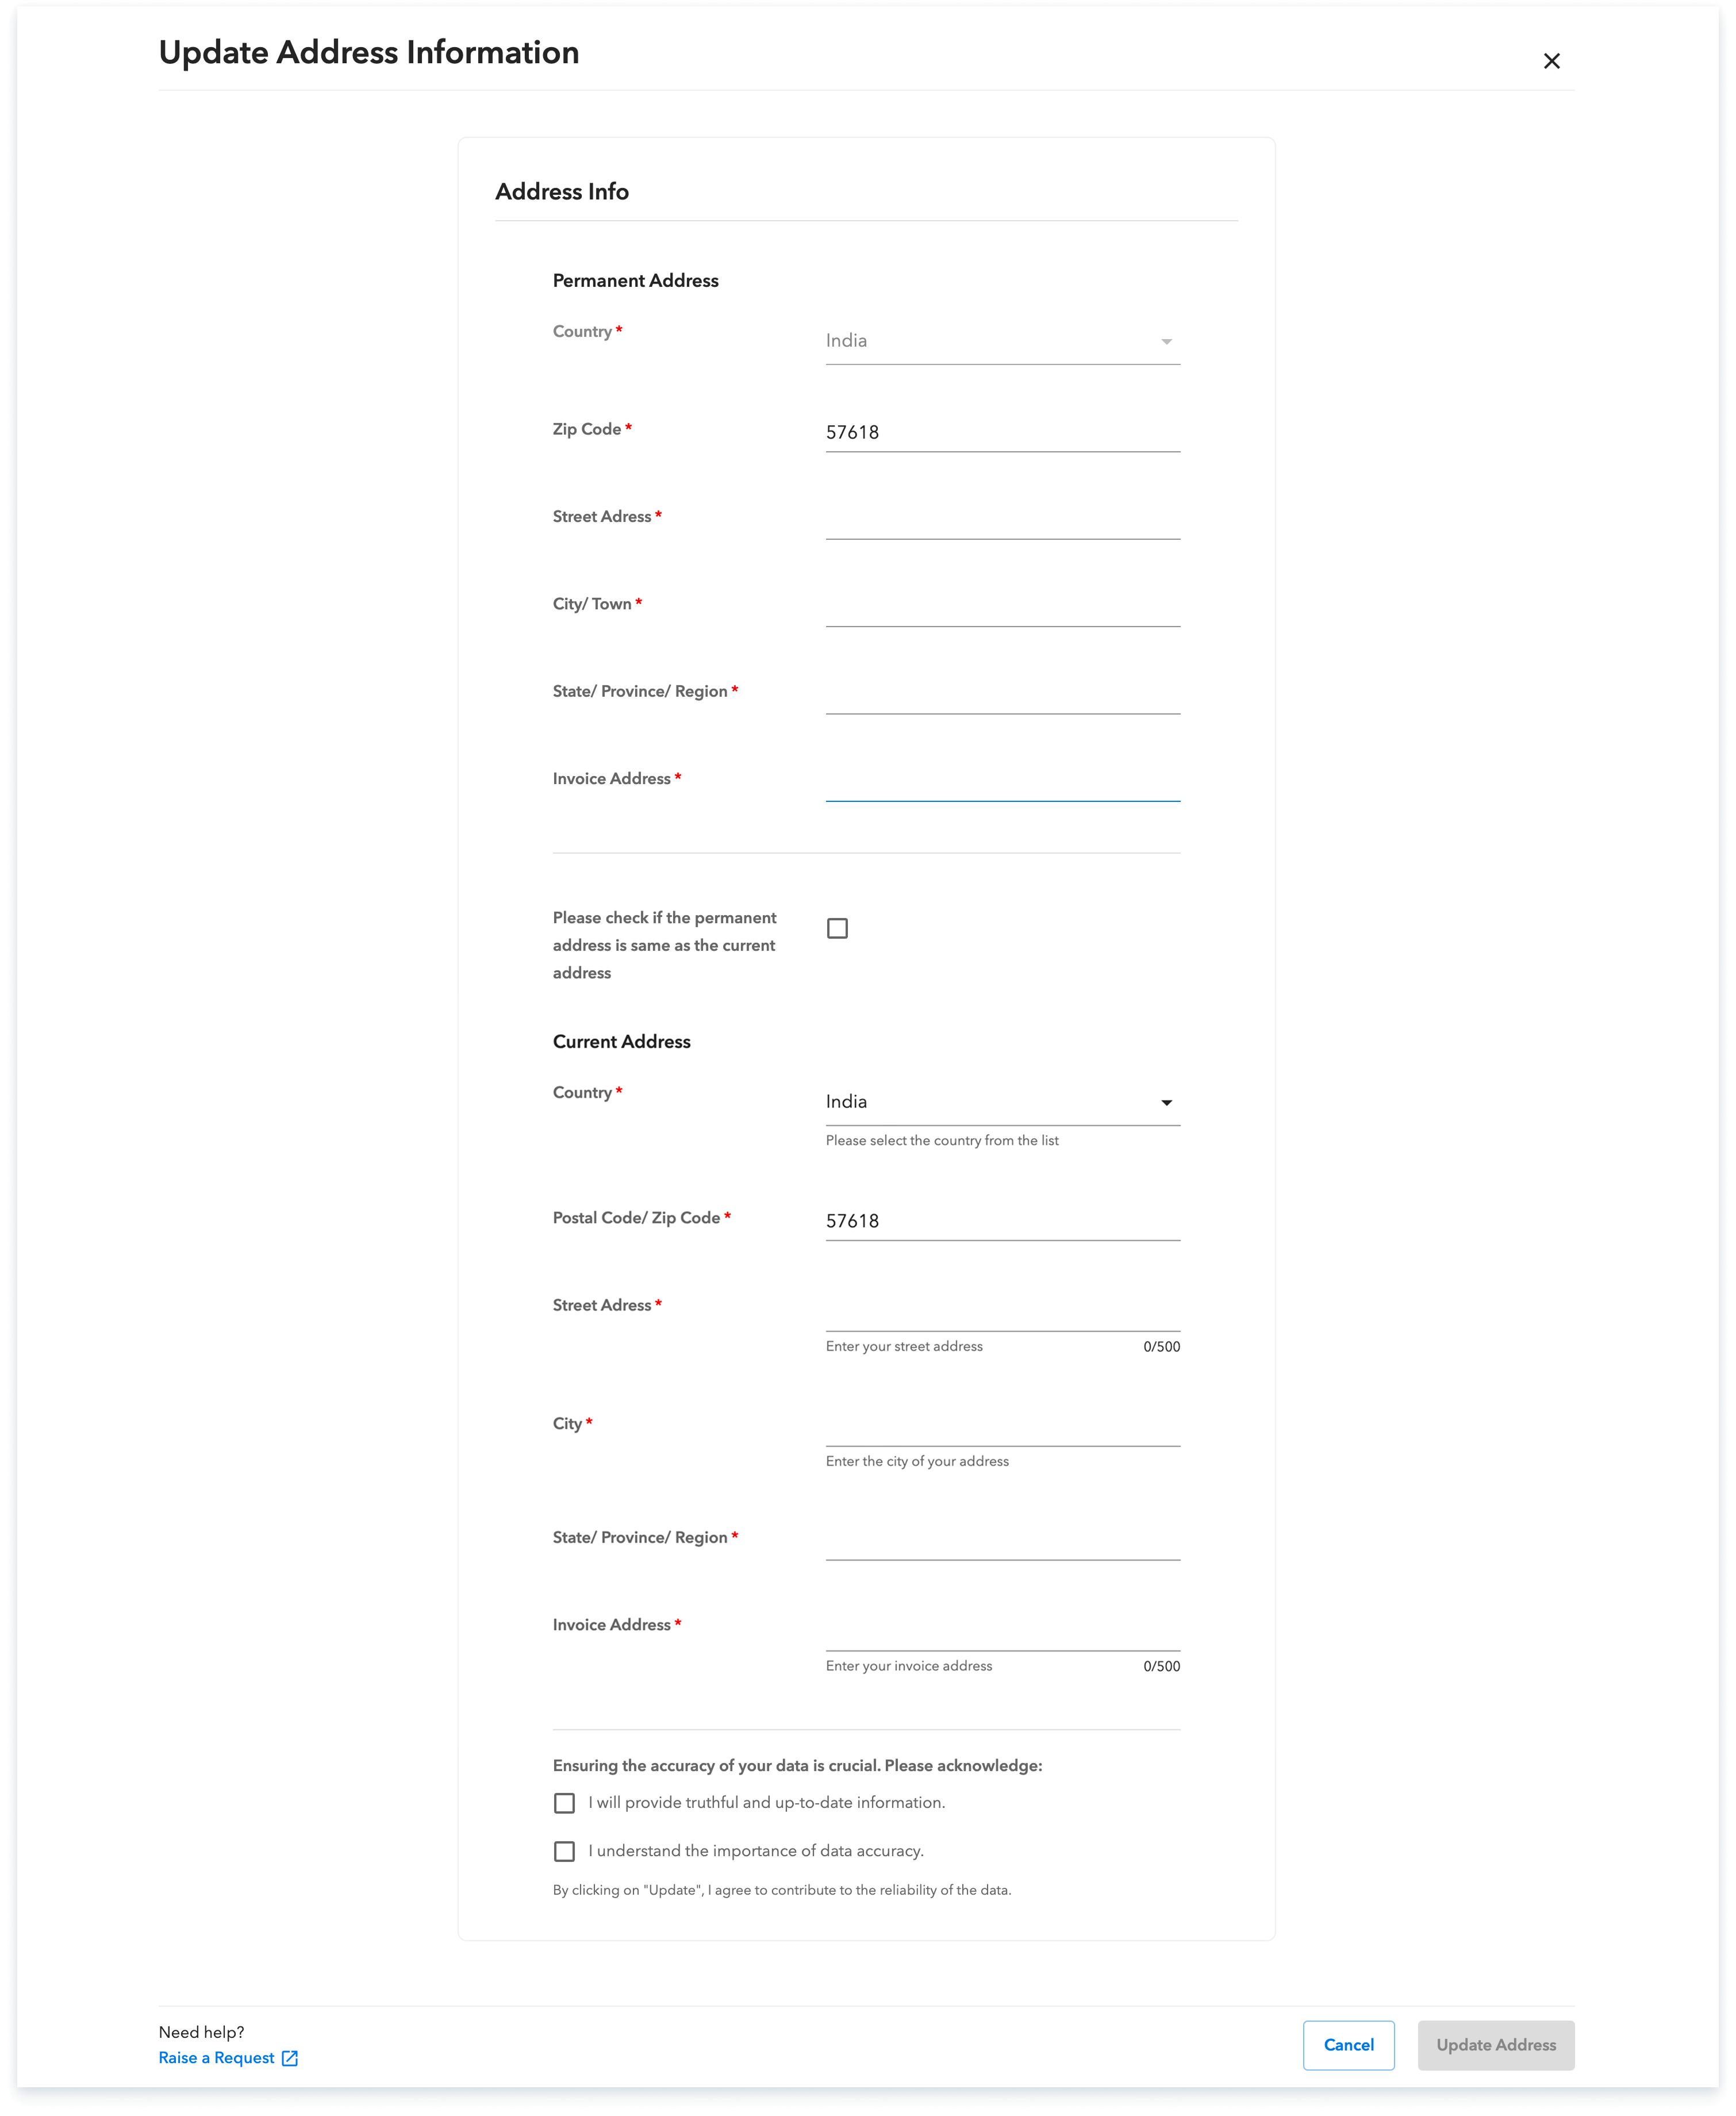
Now click on add address details and enter your current address.
Step-6:
On clicking Add onboarding documents, upload the documents mentioned. Please note that the required documents may change based on your country.Ensure your name and photo are clearly visible and match your profile.

📌 Make sure your name and photo are visible and match your profile.
Step-7:
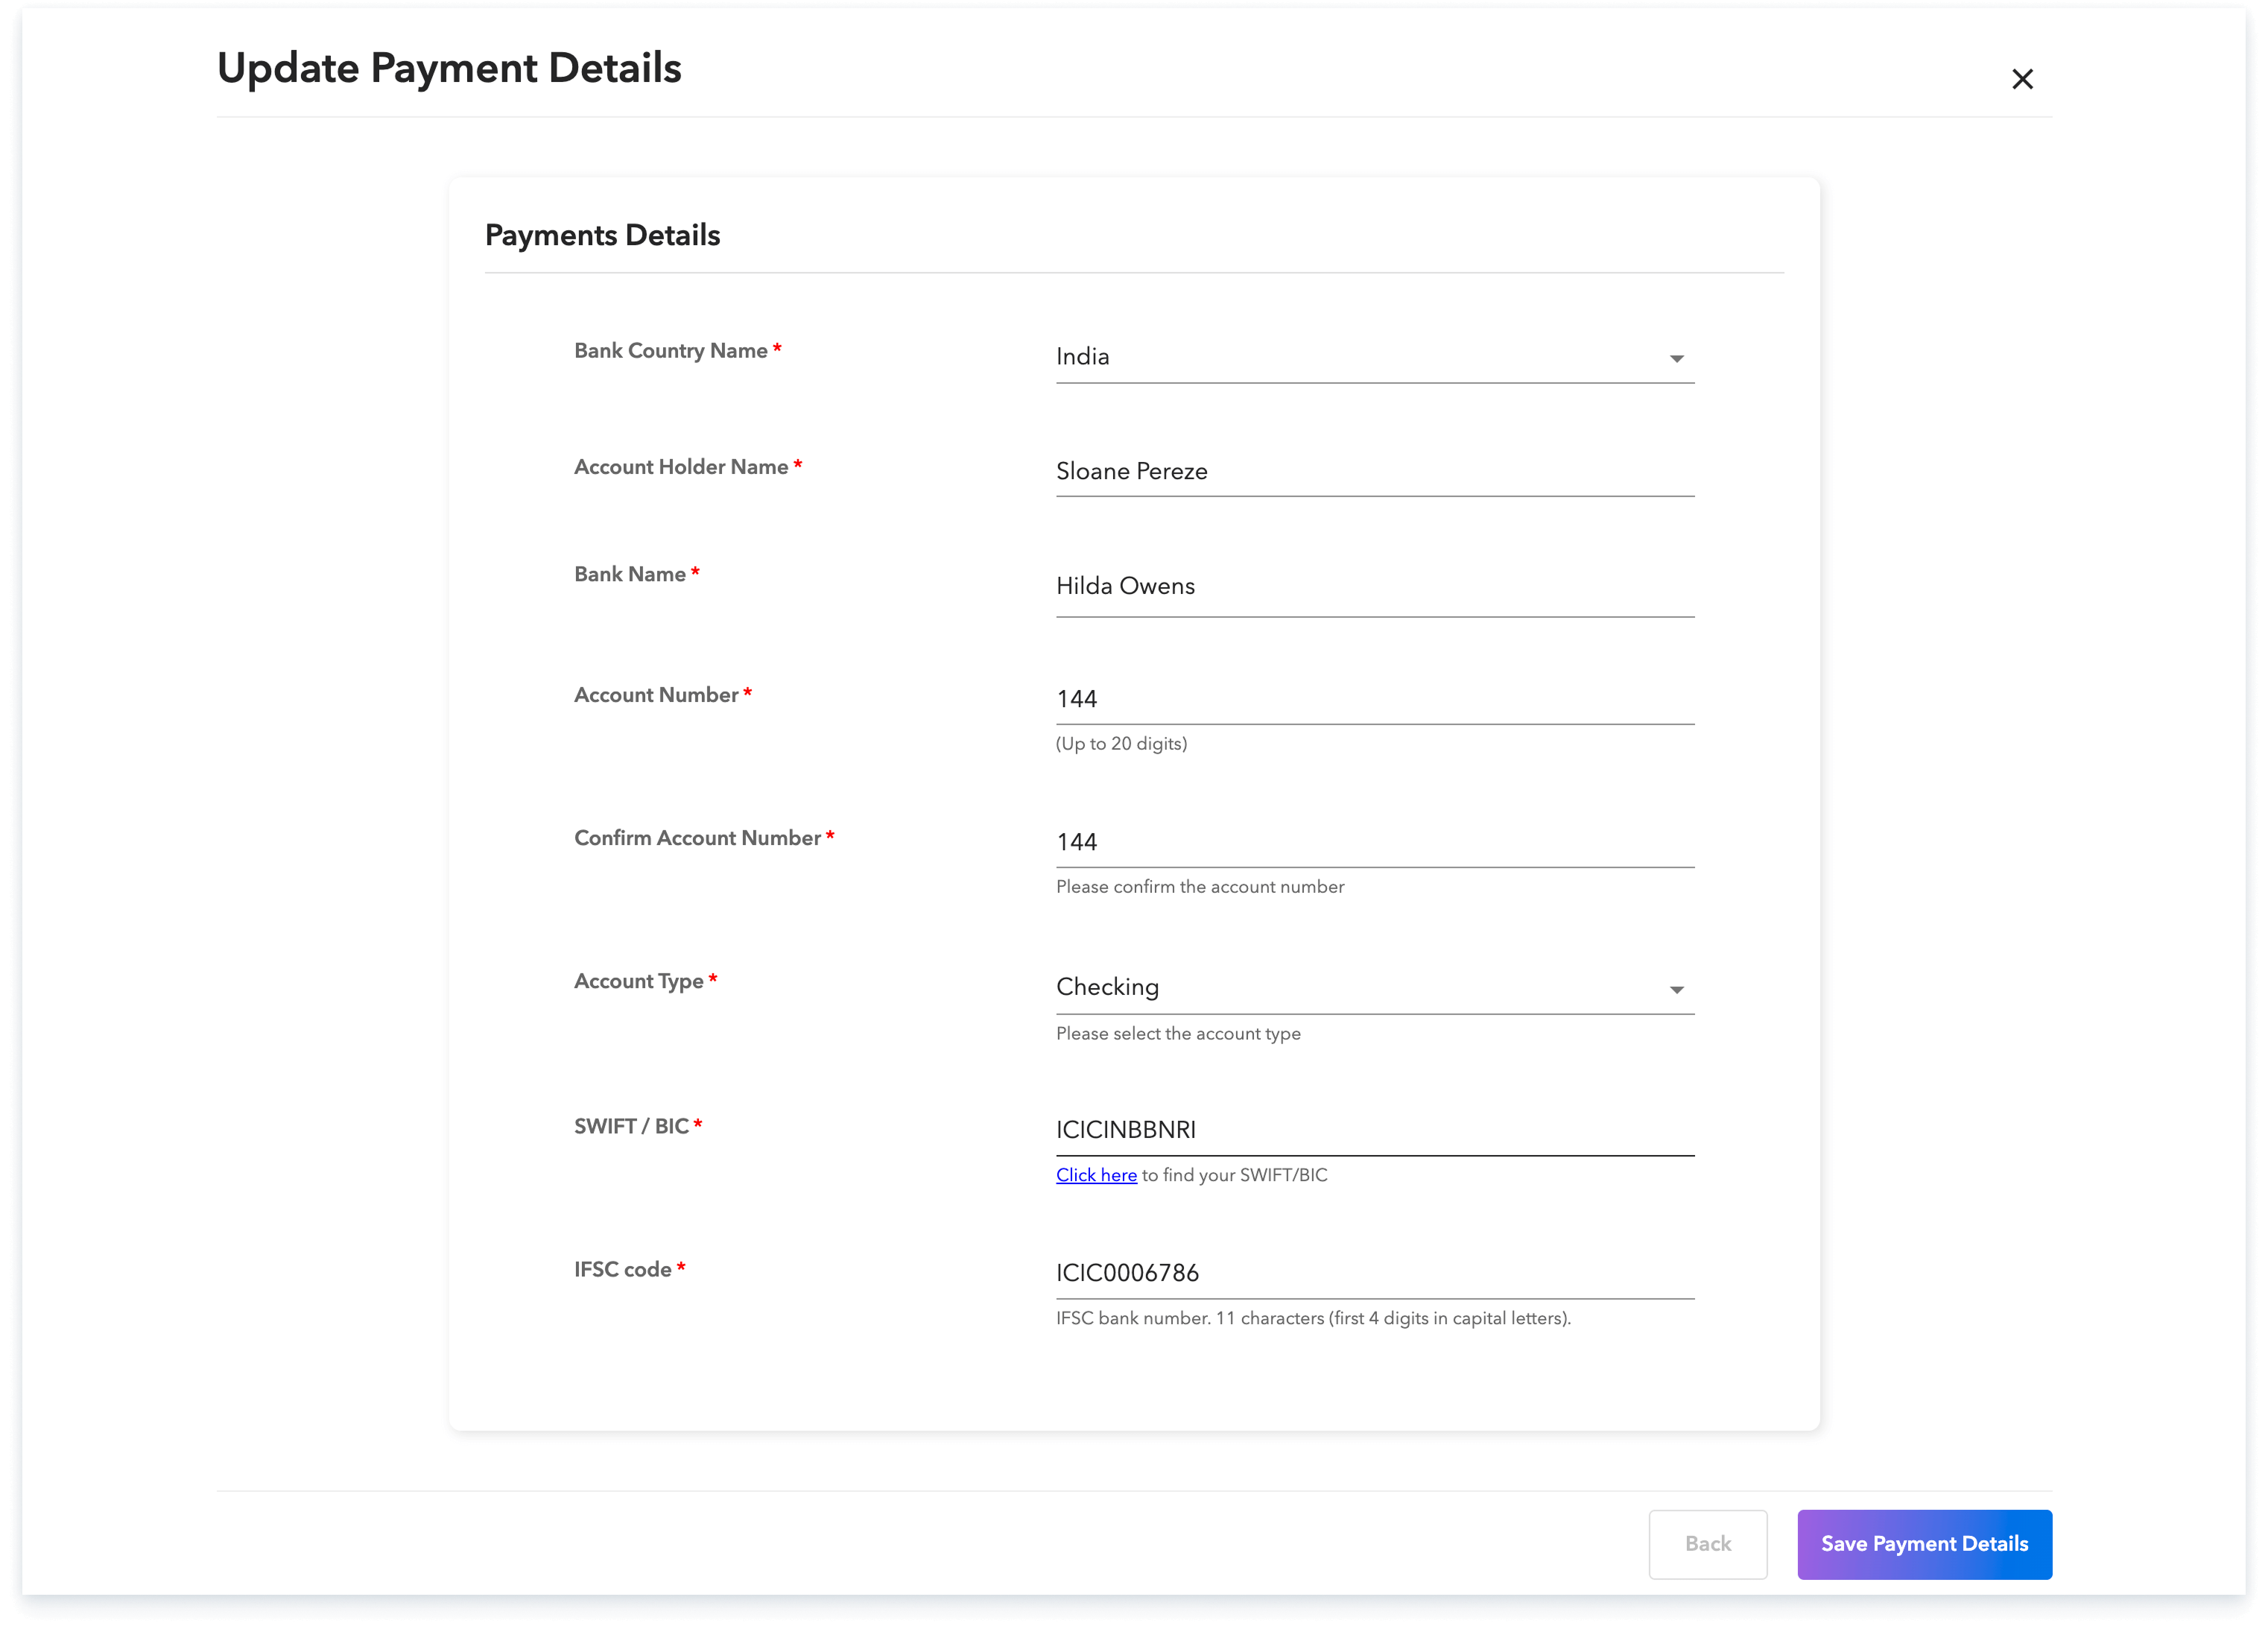
Provide your banking details, including your account number, bank routing number, and account type (checking, savings, etc.). Ensure this information is accurate to avoid any payment delays.
Step-8:
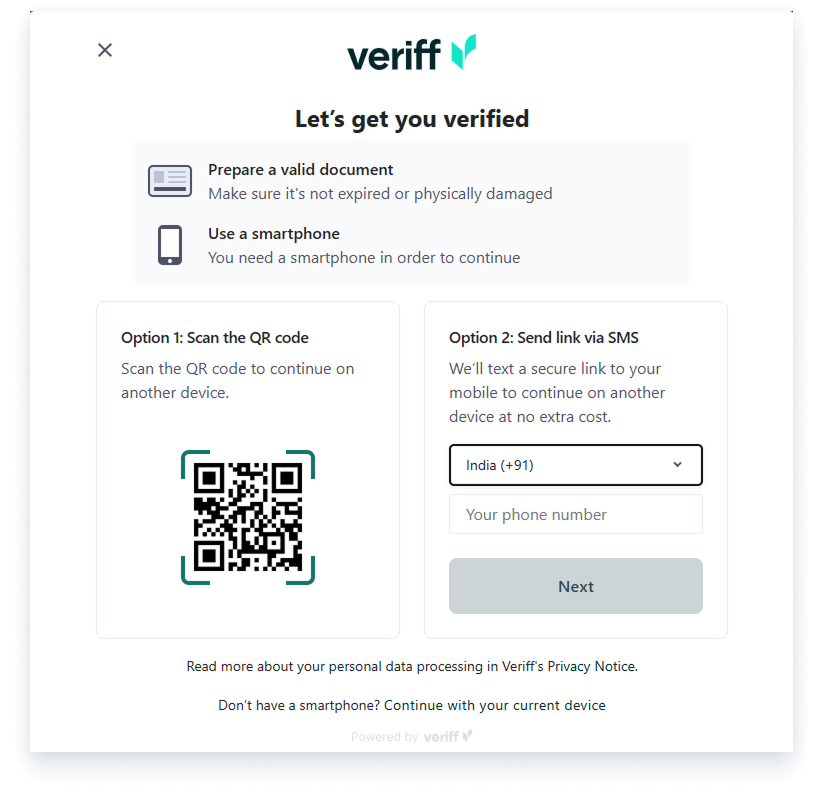
As the final profile step, you will need to verify your identity by uploading official identification documents. Acceptable documents include a passport, driver's license, or national ID card. Ensure the document is valid and visible, and then click 'Verify' to authenticate your identity.
Step 9: Sign Your Contractor Agreement
Your dashboard will display an option to ‘Review & Sign’ the agreement. This step is mandatory if you are an AOR contractor.
For Pay Only contractors, this step will only appear if your client has requested an agreement to be signed.
By completing these steps, your Payoneer WFM contractor profile will be fully set up, and you will be all set to begin your journey with the platform.
Global employment, payroll, teams and expansion, simplified.
Request demo